
This post will take a break from writing about using the New Testament Virtual Manuscript Room, the topic I covered in the last three posts. This post will dive deeper into the resources and code I used for my last post about analyzing a transcription. I hope this post will help readers with limited programming knowledge discover potentially new resources they can use and provide a more concrete example of how to use those resources and code to do the kind of analysis I did in my last post.
Languages
My last post interacts with two major languages. The first and easiest one to interact with is XML (Extensible Markup Language). By easy, I mean you will not be writing any XML. That is what the transcription editor is for! The flavor of XML that I will be analyzing complies with the Text Encoding Initiative (TEI) and the guidelines set forth by the International Greek New Testament Project (IGNTP). Your flavor of TEI-XML may be different, and that’s ok. You can achieve something similar to what I demonstrate in this post. Your code just might have to look a little different. The important thing is that you know what your flavor of XML is so that you can write code to analyze your manuscript in ways that would be difficult and time-consuming if done manually.
The second language is Python. Using Python will be a little “harder” than XML because besides reading and understanding it, you must write Python code. You could use any programming language to do what I do in this post. However, it would look very different. I use Python because it’s the language I know. If you do not know a computer language but are interested in learning, I recommend Python. It is easy to pick up, and many free learning resources are available. I had ZERO experience with programming languages, and if I can pick up Python, anybody can! Some free resources I used to learn include Python for Everybody and PythonHumanities.com.
Libraries and Tools
For those with minimal Python experience, Libraries are a collection of code someone else has written that can be used within your program so that you do not have to reinvent the wheel. The libraries I used include Requests, Pandas, LXML, Regular Expressions, and Decimal. I will go into more depth about how I used these libraries in explaining my code below. The vital thing to know is that each library contains documentation on how to use them. I learned how to use these libraries through their documentation and trial and error. The trial and error part is a good segway into explaining the tools I used.
A primary tool I use for this kind of exploratory programming is a Jupyter Notebook. I mentioned this briefly in my last post without going into detail. To keep this post short, I will not provide a tutorial on what Jupyter Notebooks are here. Several excellent resources explain Jupyter Notebooks better than I can here and here. While I used a Jupyter Notebook in VS Code for the analysis in my last post, I will use Colaborartory (Colab) in this post to demonstrate how easy it is to use. Now that I have selected my tools let’s look at the code I wrote for the analysis.
Code
My last post mentioned how to access transcriptions via the NTVMR API. I explained that you need to construct a URL with the appropriate transcription information, search that URL, and then the output on the screen could be copied and pasted into an XML file. While true, I figured out a more programmatic way to do this without creating a local transcription file. I accomplished this with the Requests Library. To use the Request library, I have to import it into my Notebook.

The documentation of Requests explains how to do this. In the image above, you can see that this simply means typing “import requests” into a code block and running it. Now, all of the functionality of Requests is available throughout the rest of my notebook. Doing this is much easier than using a traditional editor like VS Code because I don’t have to set up a virtual environment and pip install requests into that environment. I can then do the same thing with the other libraries I listed that I would be using above. Typically, in a Python file, you would include all of your import statements at the very top of the file. While you don’t have to do this in a Jupyter Notebook, I put all of my import statements into the first code block in my Notebook to keep things tidy.
A function in Requests makes an HTTP GET request for the URL I used in the last post. I can save this request into a variable and then access it using the text function.

In the image above, you can see that I created a block with Markdown text explaining what I am doing. I saved the request in the variable my_transcription and then displayed the output of that variable with my_transcription.text. A single string contains the entire XML transcription at the moment. I could write this string into a file using Python to save the transcription on my computer. If I don’t care to save the transcription as a file, I can just interact with the transcription stored in this variable.
To interact with the XML, I used the LXML Library. This Library allowed me to iterate over and drill down into the different tags of the XML. My XML transcription is one tag nested with tags that are also further nested with more tags. LXML treats each tag as a list so that if I isolate one tag, I can access that tag’s nested tags with list notation. The image below demonstrates what I mean by this.

Google Colab helped me troubleshoot an issue when I tried to load my_transcription into an etree like LXML requires. Colab told me I needed to convert the string to bytes and load it. I followed Colab’s advice, and it worked like a charm. The variable root points to the very first tag of the XML transcription, the TEI tag. To demonstrate how the tags nested within the first tag, I looped through each tag element in the root and printed the tag. The output shows only two tags, the teiHeader, and the text tag. Now, more tags are further nested under these, but this demonstrates how you can iterate over and select tags.
In my image above, you can see that each tag is preceded by “{http://www.tei-c.org/ns/1.0}”. After some googling around, I learned that this is a namespace. It was causing me to reference the namespace every time I tried to find specific elements, so I wrote some code that removed the namespaces from my LXML etree.
Looking at the XML transcription, the entire transcription is nested inside the body tag, which is nested in the text tag.
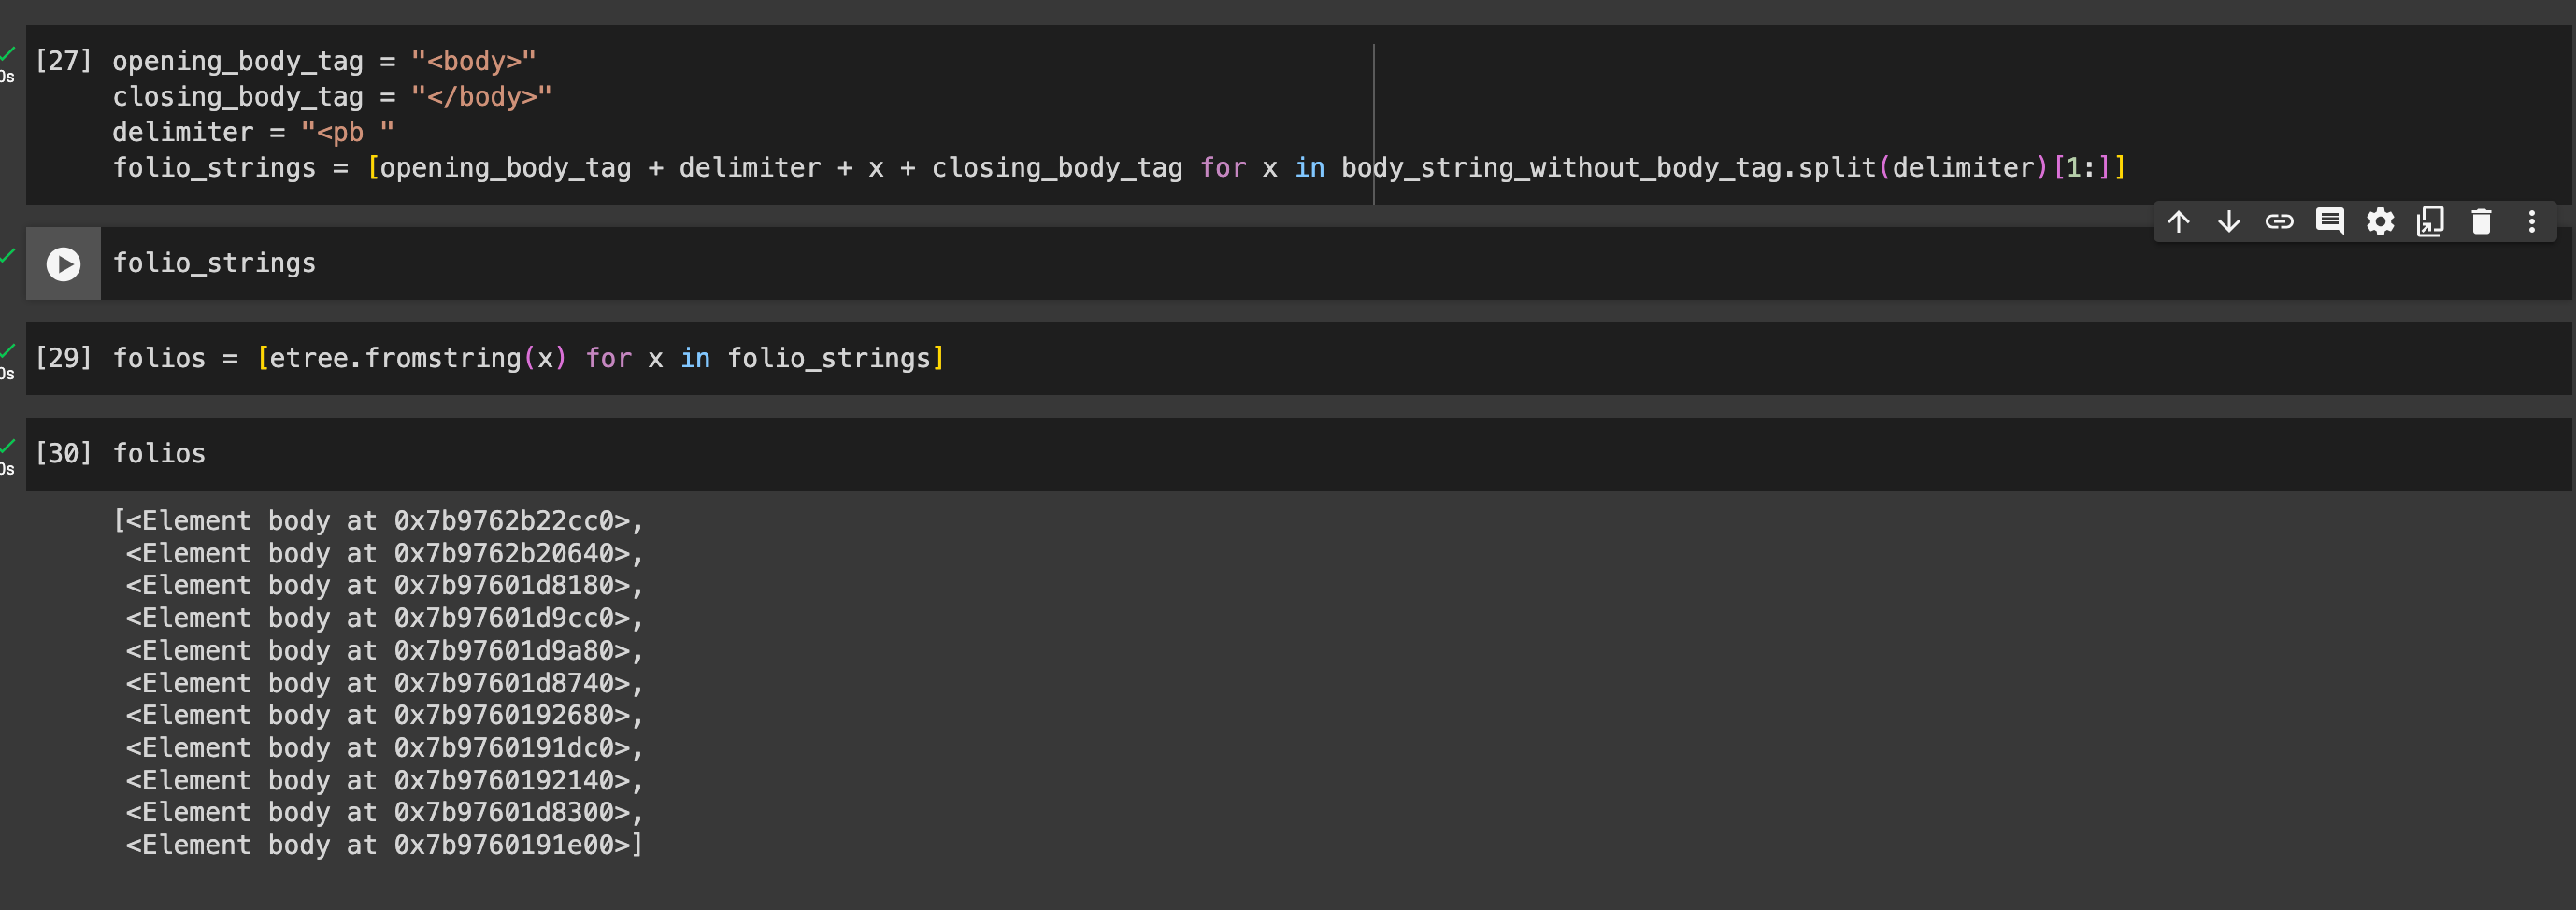
The pb (page break) tag separates each of the folios. I’m a self-taught programmer, so my solution may not be the most efficient, but I decided to break up this LXML etree at every pb tag. I created a Python list of etrees made up of the pb tag. This way, I could treat each etree as its own page of XML transcription. To do this, I needed to clean up the XML a bit. First, I converted all the XML nested inside the body tag to a string. Then, I used the Library for Regular Expressions to find and strip away all of the newline characters (\n) from this string as well as the closing body tag (</body>). For an explanation of Regular Expressions and other use cases, see these wonderful posts by Mariana Zorkina and Gian Rominger.
Next, I split this string at every pb tag, appended an opening and closing body tag to each split section, and added that section to a list using Python List Comprehension. Finally, I converted each of the strings containing its own XML structure for each pb tag into a list of etree objects saved to the variable folios.
Now, I can loop over each of these etrees in my folios list and do some analysis. I noted in my last post that researchers record basic statistics for codicological data by examining a sample size of folios for the manuscript by hand. Because my XML transcription encodes the kind of data researchers look for, I can find this information for all the folios I have transcribed, which are now saved in my list of trees. I want to know the number of columns per page, lines per column, words per line, total number of words, total number of corrections, where those corrections are, etc.
While I know that I only transcribed 2 Timothy and Titus in the example transcription for the last post, I want to write the code in a way that can determine what the biblical content is. I can see in the XML structure that every shift in biblical books, chapters, and verses is marked with a div tag that encodes the book, chapter, and verse numbers. The books are organized by the letter B and a number, starting at 1 for Matthew and ending at 27 for Revelation. I created a Python dictionary using the book encoding as keys and the corresponding biblical books as values.

I want all the information on the folios saved into an Excel-like format displaying information in rows and columns. After tinkering with a few designs, I wanted one row of data corresponding to a single line. To achieve this, the next library from my list above can help. The Pandas library is a powerful Python library for structuring data into a Dataframe (rows and columns). To convert my data into a Dataframe, I need a dictionary where each key is the columns, and the values are lists that contain data for the rows. I initialized this dictionary to fill it with the data I wanted.

Now comes the most complicated bit of code yet. Again, being self-taught, this may not be the most efficient or elegant solution, but it works. I loop through all the etree elements in my folio list and then through each tag in the present element. I initialize an empty variable for each piece of data I want for each column, and when I encounter specific tags, these variables get updated. Once I have finished looping through all the tags, I append the variable to the appropriate dictionary lists.

I’ll briefly mention the last Library on my list, Decimal, because it can be seen inside the loop in the image above. I used Decimal to help make some of the math operations I will perform on the data more precise. When a word breaks across two lines, I count these as half a word for the words per line, and Decimal provides more precise operations on decimal numbers than the standard float type.
Now, I can convert my dictionary to a Pandas Dataframe. Because of the structure of the XML, I technically have a zero line, so I drop all rows that contain a line number equal to zero and reset the index. To keep things fresh for this post, I used the INTF’s published transcription of P46 for this code this time.

Now, I can query this Dataframe in all sorts of ways.
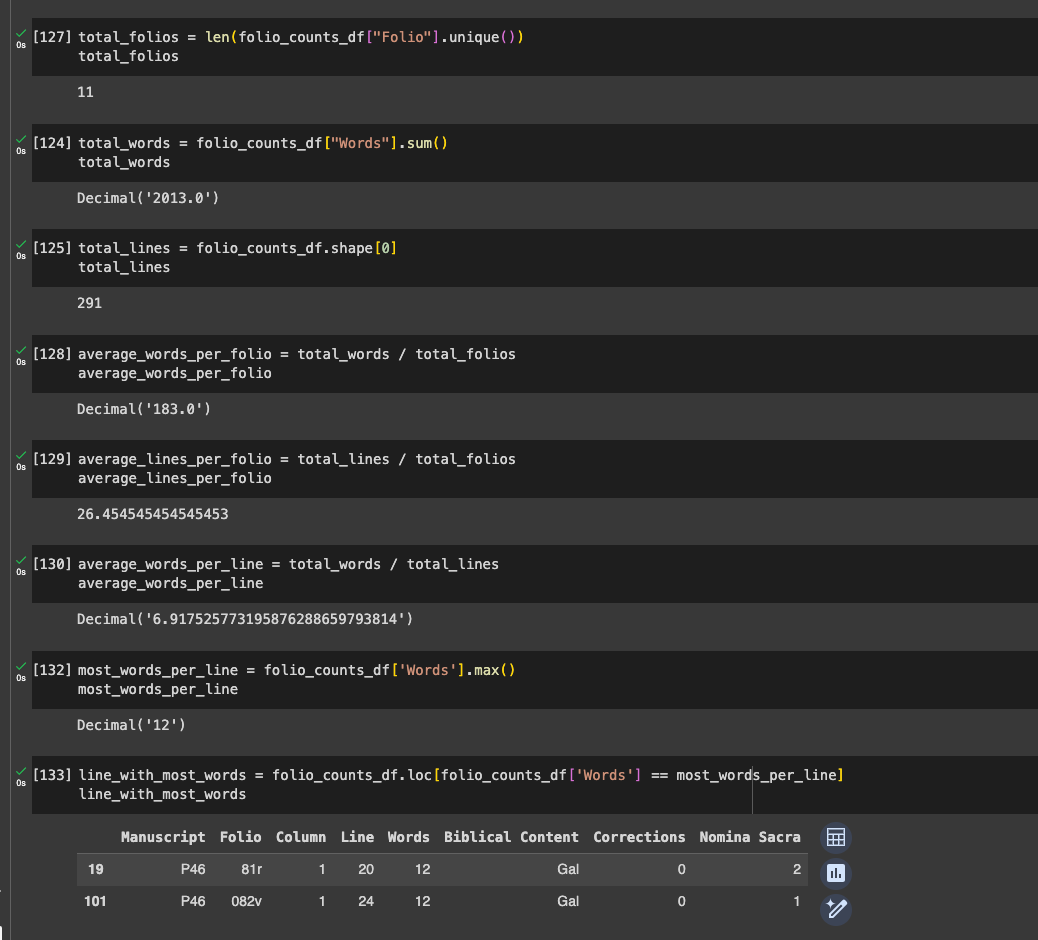
I can also look for information about corrections.

Conclusion
This is how I chose to tackle this problem and how I chose to organize my data. The beauty of Python is that you can easily customize what I have done here to suit your needs better or improve upon the approach I took here. I hope to have demonstrated some resources you can use to leverage Python to analyze TEI-XML transcriptions for information such as codicological statistics. If you have already done the hard work of transcribing a whole manuscript in TEI-XML, you should squeeze every ounce of information out of that transcription. Because XML is machine-readable, Python provides the means to read that XML and convert it to the data you need.

You might want to look at the BeautifulSoup library for more elegant (and robust) ways of parsing XML
Thanks for this suggestion! I’ll check BeautifulSoup out.