
This is a contribution by Christine Roughan of NYU. Connect with her on Twitter @cmroughan
Over the summer of 2019, inspired by the promising results in articles like Romanov et al. 2017, I set out to use the Kraken OCR software on a variety of texts. Kraken, see their website or their repository, is open-source command line software that is capable of reaching accuracy rates in the high nineties for Arabic and Persian printed text.
Kraken is not equipped to handle every text – I recommend using it only on works for which you have clear PDFs or page images (300 DPI is the usual recommendation) and in which the text is laid out in one column. If you are starting from a PDF, use your tool of choice to separate the pages into individual image files. I use pdftoppm or ImageMagick’s convert tool, and I have been able to use Kraken with PNG, TIFF, and JPG files.
While I did not have any luck with Kraken’s pretrained models, I was successful with quickly training my own models, a process which I jumpstarted using Kraken’s ability to produce artificial training data from a selected font and text.
This post will offer a walkthrough on getting started with Kraken, with a focus on a workflow that takes advantage of artificial training data.
I. Downloading and Running Kraken
Kraken will only run on Linux or Mac OS X, so if you are on Windows you might look into running it on a Linux virtual machine.
Several options for installation are listed on the Kraken website and on its Github readme. Only one of these worked for me, and it was installing Kraken in a conda environment. The steps for that method are as follows:
1. Install the conda environment manager.
If you do not already have conda, follow the steps for your system as provided by its documentation here.
2. Download the Kraken environment file and set up the environment in conda.
Running the following two lines in the terminal will first download the environment file and then use it to set up the conda environment:
> wget https://raw.githubusercontent.com/mittagessen/kraken/master/environment.yml
>
> conda env create -f environment.yml
If your installation was successful, you will be able to use Kraken while in its environment in the terminal. To enter the environment, type:
> conda activate kraken
When you want to exit the environment, type:
> conda deactivate
or simply close the terminal. Note: if you are running an earlier version of conda the commands may instead be ‘source activate’ and ‘ source deactivate’.

II. Preparing Artificial Training Data
If you would like to transcribe training data yourself, Kraken offers a built-in transcription environment that is hosted locally in your browser. See the instructions and options for the ketos transcribe command here.
In this guide, however, we are automatically generating training data, and for this we need 1) a font that is close to the typeface of what we want OCRed, and 2) a sample text which contains all of the characters we want the computer to be able to identify.
1. Find fonts similar to your typeface
I can offer some suggestions of places to look for Arabic and Syriac. For Arabic, you might consider:
- the Arabic fonts offered by SIL (see also their collection of fonts for Asian and African scripts)
- the Amiri font, by Khaled Hosny
For Syriac, you might turn to:
- the Meltho fonts offered by Beth Mardutho
It is quite likely that you will not find a font that is a perfect match for the typeface you ultimately want OCRed. However, if you can get close, this will still speed up the creation of a working model. You may find it faster to correct erroneous OCR results to use as further training data rather than type all the training data from scratch.
2. Finding and editing a sample text
Training data for Kraken takes the form of a directory of paired image and text files, where each pair consists of an image of a line and the transcription of that line, respectively. So one of the pairs Kraken uses might look like this:

To produce your artificial training data, you need to input a text that will be used to produce these image-text pairs. You could find sample texts from any number of sources – for Arabic you might turn to al-Shamila (see also Latif’s post on the topic), the corpus of OpenITI, any of the texts in Wikisource, etc. For Syriac, you might consider the Digital Syriac Corpus. Whatever you choose, make sure you can download or convert the text to a plain-text .txt file.
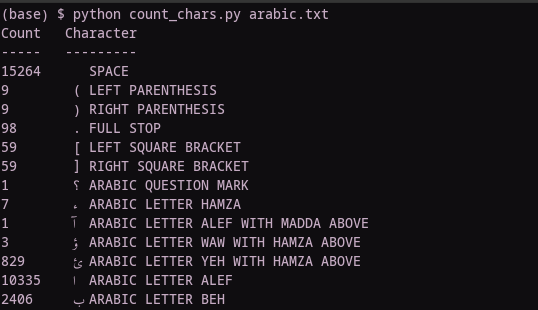
The text you choose does not have to match what you want to OCR, but you should make sure that it contains all of the characters that you expect to encounter. I wrote a Python tool for checking this as part of my own work; feel free to use it in your own efforts: count_chars.py.
The tool is only diagnostic, so if you do not have representative samples of the characters you need, you will have to choose a new text or insert them yourself. In my work, I chose the latter approach. I do not have a reusable tool for this, but you can take inspiration from the Python code I wrote to solve my problem here: add_text.ipynb.
Lastly, when you have a sample text you are happy with, you need to split it into lines that approximate the line lengths that might appear on a page (otherwise, Kraken will not know how long to make the lines). I’m sure there are tools that can do this, but I wrote up a simple Python tool to do it for me: line_breaks.py.
III. Generating the Artificial Training Data and Training the Model
See Kraken’s documentation (or run ketos linegen — help) for a full list of options. Please note that — means ‘two dashes’, i.e. – -. The software on which this website runs automatically turns – – into — (a so-called em-dash) but when you wish to run this command you should type the double dash. Otherwise generating your training data can be as simple as:
> ketos linegen -f (font) -o (training data directory) (sample text.txt)
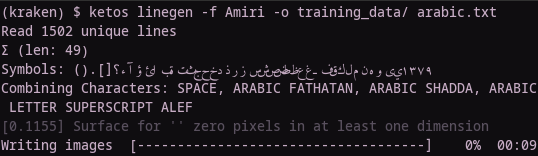
From my own work, I recommend experimenting with the -fs / –font-size option (note again to write double dash, not an em-dash) to make your training data come out at the same size as the text in the images you want to OCR. If you are dealing with bold text, experiment as well with the -fw / –font-weight option.
Generating the training data can take some time, especially if you have input a long text.
Once you have the training data, you are ready to train a model. See the documentation or ketos train –help for more options, but the simplest option is:
> ketos train -o (model prefix) (training data directory) /*.png
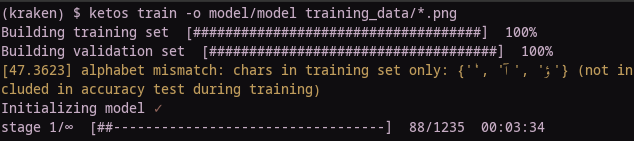
This is another step which will take some time (for example: on my computer, with about 2750 lines of training data, about 3.5 hours). Kraken will run multiple stages of training, and you can monitor whether you are getting decent accuracy rates after each stage of the process.
Kraken will try to automatically select the best model and rename it as such. You are now ready to try it on the text you want OCRed.
IV. Fine-tuning the Model
Your first time running OCR on your desired text with your new model will have lower accuracy than the accuracies reported when training the model on the artificial data. This is why we refine our model, and we use the current stage of our model to jumpstart this process.
To do so, take your desired text and put it into Kraken’s transcription environment, using your current model to pre-fill the transcription boxes:
> ketos transcribe --prefill (model) -o (html file) (page1.png page2.png …)
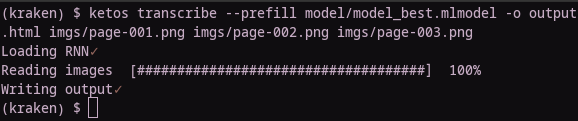
When you open output.html in a browser, you will see each page image and the OCRed lines. If your OCR results are good, you can quickly edit any mistakes in these boxes and in doing so, create new training data to refine your model. To save your work, you can click the “Download” link on the page. Alternatively, save the HTML page with Ctrl-S or “File: Save Page As…”
In my project with Arabic, I corrected 5 pages, refined the model, decided there was still room for improvement, and corrected another 5 pages, which gave results satisfactory for my purposes. Experiment to see what meets your project’s needs.
When you are ready to fine-tune your model using the corrected training data, you can extract the line images and text from the HTML file with the command:
> ketos extract -o (new training data directory) (html file)

You can then refine your model as follows:
> ketos train -i (old model) -o (new model prefix) (new training data directory) /*.png
You may want to include characters in your new training data that are not present in the old training data. If so, be sure to use the –resize add option so that your new model will train.

If all goes well, you will now have an OCR model that is better equipped to handle your text. This step may be repeated as many times as needed, and successive steps should cut down on how long it takes to correct the output OCR and new training data.
V. OCRing your Texts
Finally, with your improved model in hand, you can use the following command to OCR the text you want:
> kraken -i (image) (output .txt file) binarize segment ocr -m (model)

This command runs on one image at a time, saving the OCR results to the output TXT file that you specify. kraken –help mentions an option -I / –batch-input that is intended for batch input, but I have not been able to make this work. However, if you keep all your page images in one directory, it is easy to iterate over all of the image files in a for loop, as in the example below:

I hope this guide has been helpful, and as a parting example I link a Jupyter Notebook here that records the results I achieved in my own tests. Go forth and good luck!
Thanks for this amazing tutorial, Can you please share your resulting mlmodel file, I really appreciate your help.
for batch OCR you need to escape the folder like this:
kraken -I ‘*.png’ -o ocr.txt segment …
Like mention in the doc here: https://kraken.re/4.2.0/advanced.html
I found your article way before finding it in the doc. Hopefully it will help someone.